Gravity Knight Part 4: Mesh Export.

Low poly count and minimal number of small textures are very important for mobile game development. In this article we want to show you a couple of strategies we used to accomplish this.
Environment Atlas
First of all we created a single file with all parts of the environment. We did this because Qubicle is able to create a texture atlas of multiple objects on export. This simply means that all textures for the individual objects are merged into a single one, saving files and unused texture space.
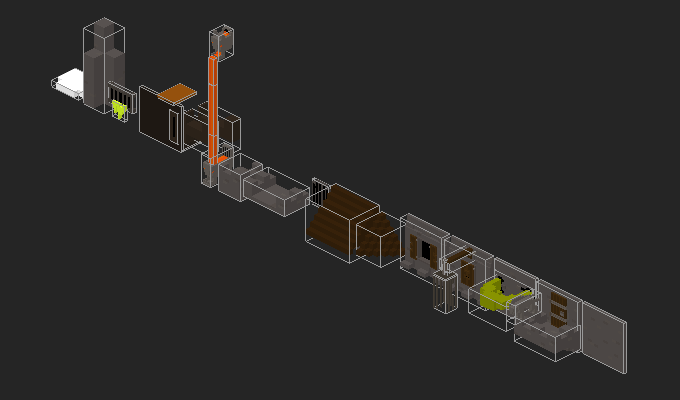
Before the actual export we removed all redundant parts of the wall pieces. Our goal was to create prefabs in Unity and duplicate those prefabs as needed. E.g. for the tower piece that contains two lava streams we simply removed one of them. And we could also remove the wall because it was the default one. That way we were able to eliminate two thirds of this tower piece.
Better Mesh Optimization
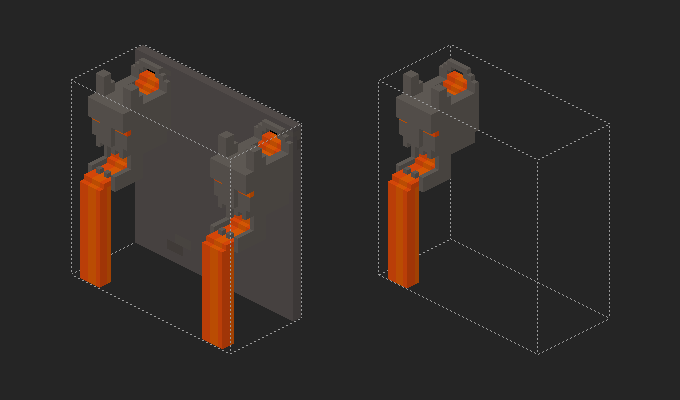
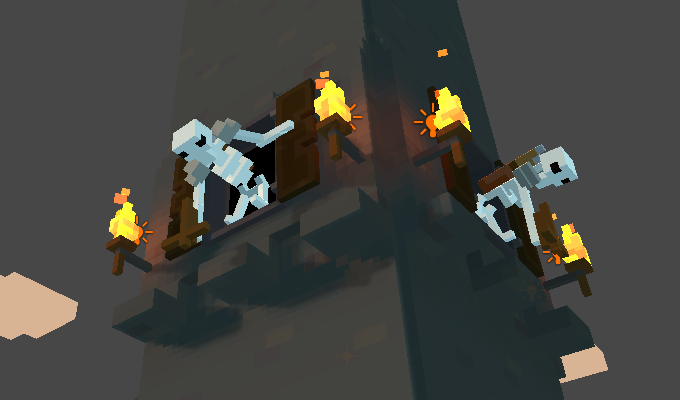
Qubicle’s mesh optimization is very good at reducing the poly count. But there is one very easy thing you can do to make it perform even better. Let’s have a look at the following image:

On the right side you see what happens when you export this model as a single object. For the mesh on the left side we simply separated the loose bricks and the green tendril from the flat wall. So, we exported 3 separate objects which could then be optimized on their own without interfering with the other parts. In short, the less exposed voxels, the better the optimization.
Face Removal
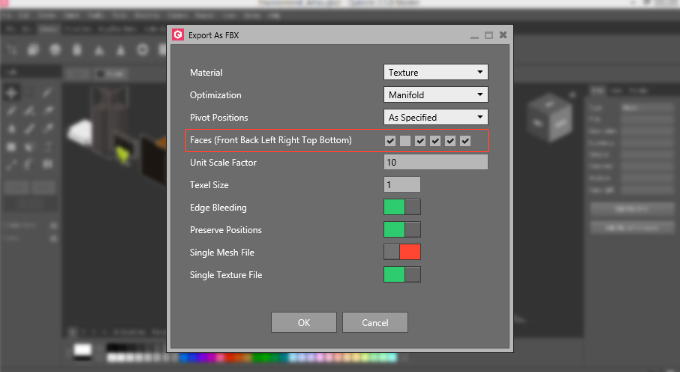
Another useful feature of Qubicle’s FBX mesh exporter is the option to automatically remove faces. This comes in handy when you are sure that certain sides of a model will never be visible. E.g. the back side of our default wall will never been seen. Therefore we exported this and all other similar pieces without back faces.
A Final Texture Merge
Since we decided to export one part of the environments with all faces and the other part without the back faces, we had two resulting texture maps. To avoid a second draw call we merged both textures. We used Photoshop to copy both textures into a single one and Maya to scale and remap the UV’s.
Explore more like this
Gravity Knight Part 9: Visual Effects.
For visual effects like sparks, dust or clouds we used particles. We wanted them to pick up the simplified look of voxels in a similar way as all with other...
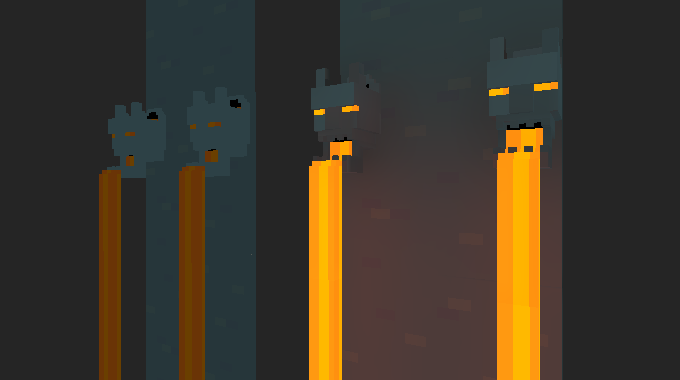
Gravity Knight Part 8: Emission Maps.
As soon as we decided to drop real-time lighting, we had to find alternatives to handle objects that are regionally lit, like torches or lava streams. Spot and point lights...